|
previous tutorial |
ACG Home |
Instructor Home |
Class Home |
list of tutorials |
next tutorial |
- Today's Goal
- Enhance initial drawings
- In this second step of the project, you return to each of the outlines traced in step one, and add drawing features to suggest solid three-dimensional objects. The end result will be five files, each showing a different crest with your enhancements.
- Make your own creative statement
- The handout describes several different graphic techniques--you decide how to match crests and techniques.
- Additionally, you can devise additional techniques, or combine multiple techniques on the same file.
- Some 3-D approaches you can try:
- Drop shadow: (creates the illusion that the crest is floating above the surface of the page)
- Select the outermost path of the crest outline. Edit-->Clone.
- Modify-->Arrange-->Send to Back; make sure the cloned image is still selected.
- In the Transform palette (display using the Window menu) click on the Move icon (the first one at the top-left).
- Enter the distances to offset the cloned image both horizontally and vertically, click <Apply>. Leave the path selected.
- Use the Fill and Stroke Inspectors to set outline to None and the fill to Basic (choose an appropriate color or tint)

- Cast shadow: (creates the illusion that the crest is standing upright on a receding surface)
- Select the outermost path of the crest outline. Edit-->Clone.
- Modify-->Arrange-->Send to Back; make sure the cloned image is still selected.
- Double-click the Skew tool (the second from the bottom in the right column in the Toolbox) to activate the Skew icon in the Transform palette.
- Click on the lower-left corner of the clone to enter its coordinates for Center X & Y
- Enter the skew angles: -45° for horiz., 0° for vertical. Click <Apply>. Leave the path selected.
- Click on the Scale icon in the Transform palette (the third one from the top-left).
- Click again on the lower-left corner of the clone to enter its coordinates for Center X & Y
- Uncheck Uniform. Enter Scale Factors: 100% for X., 60% for Y. Click <Apply>. Leave the path selected.
- Use the Fill and Stroke Inspectors to set outline to None and the fill to Basic (choose an appropriate color or tint)

- Depth: (creates the illusion that the crest is a 3-D object with sides)
- This will be easier with simpler objects, such as the three-arm crest.
- Before starting, make sure that "Join non-touching paths" in File-->Preferences (Object category) is checked
- Select the outermost path of the crest outline. Edit-->Clone. Leave the path selected.
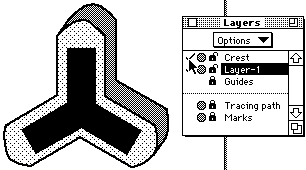
- Use "New" in the Options menu of the Layers palette to create a new layer.
- Click on the name of the new layer to transfer the clone to that layer. Press Tab to deselect.
- Drag the name of the new layer below the name of the Crest layer, so that the clone will be behind the original crest in the drawing.
- Click to remove check mark next to Crest layer, hiding it.
- Click on the name of the new layer to make it current.
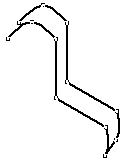
- Use the Arrow tool to shift-select the two points at the beginning and end of the visible portion of the outline (this is the part of the sides of the object seen by a slightly off-center viewer).
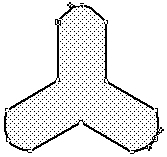
In the picture above, the selected points are shown outlined and with direction handles extended.
- Use Modify-->Split to break the path at the selected points.
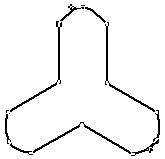
- Deselect all, then select the part of the path not visible to the viewer and delete it.
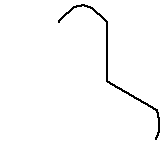
- Select the cut path. Edit-->Clone. Use arrow tool to move this second clone both horizontally and vertically. Leave selected.
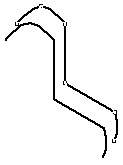
- Shift-click the first clone with arrow tool, so that both cut paths are selected.
- Modify-->Join. This will connect one endpoint on the first path to the closest endpoint on the second path.
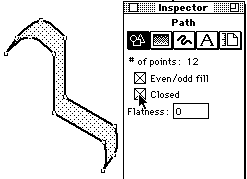
- In the Object Inspector, check Closed to close the combined path.
- Use Fill and Stroke Inspectors to set the appearance of the combined path as appropriate.
- Click to display check mark next to Crest layer, showing the original crest outline.
- Shading and highlights: (create the illusion that the crest is 3-D through lighting effects)
- Create a shape suggesting the shading on the crest, and large enough to completely enclose the crest.
- Fill and Stroke Inspectors: Line: None, Fill: Basic (choose a dark shade).
- Create a second, smaller shape (completely enclosed by the previous one) suggesting the shape of the highlight on the crest. Use Object Inspector to verify that the path is closed.
- Fill and Stroke Inspectors: Line: None, Fill: Basic (choose a light shade).
- Select both the highlight and shading shapes. Modify-->Combine-->Blend.
- Overlap the blend on the crest. Edit-->Cut.
- Select the outermost path of the crest outline. Edit-->Paste Inside.
|
previous tutorial |
return to top |
next tutorial |